Tuesday, December 20, 2011

Polymer Clay Creations


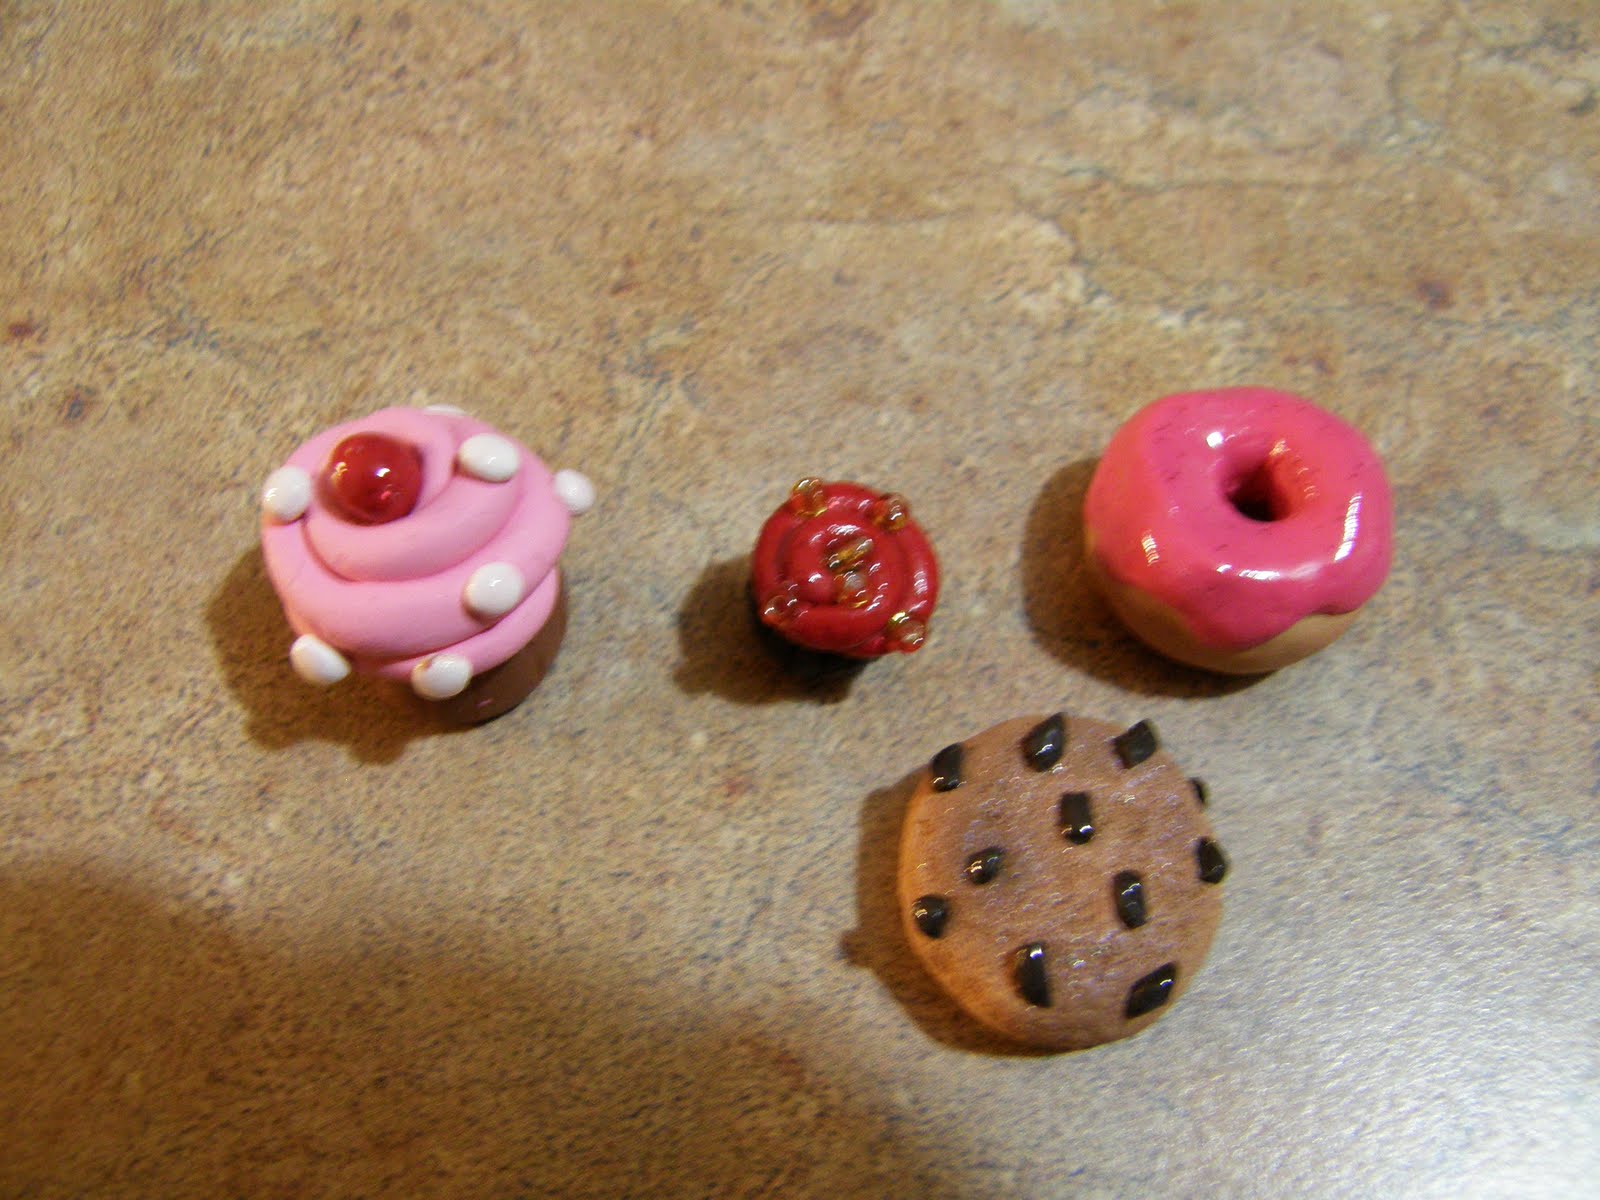
I finally got my materials! Above I have two cupcakes, a donut and a chocolate chip cookie that I made. As you can see they're fairly small, no bigger than a quarter. They go in at 275 in the oven for 15 minutes, they're super hot when they come out - had to let them cool for 5 - 10 minutes. These little guys are so easy and fun to make! I'll have to post tutorials on how to make some of them as I go... I should have ones up about the donut or cookie sometime soon.


Here are all the materials I used. Top left, is the sculpey gloss that I use over the creation once its cooled from the oven. Next to it is a hardly used eye shadow pallette (used for shadowing the cookie for the 'cooked' effect). Below are all the different colours of bakeable clay I got - the different brands range in price. The red, craft smart, is the cheapest at around $2.29 per 2 oz, and FIMO at around $2.79 I believe. To the right of the clay, I have the tools I used. An unused toothbrush for texturizing, a couple paint brushes and a pencil. Below, I have eye pins for making the creations into charms. To the left of that, I have a bead box and a cutting tool used for cutting the clay.


All of the above supplies were purchased at Michaels (excluding the tooth brush, pencil, paint brushes, beads.. got them at the dollar store, and eye shadow pallette) for a little less than $40.


...If I don't post again before Christmas, Merry Christmas! :)


Sunday, December 18, 2011

Exciting news! Clay creations in the works

I am so so so excited to start making these. Usually they're made as charms, so no bigger thank a quarter - but sometimes larger. Hopefully in the next few days I'll be able to make a Michaels run and pick up a few different coloured clays and tools... I'm thinking about making donuts, ice creams, cupcakes, possible animals.. (cats, dogs, elephants.. they're my favourite!)
Updates soon on those - and any I make, I will post :)

Saturday, December 17, 2011

I've returned! Pillows Pillows Pillows and Colouring


I'm sorry I was gone so long without a post... school has been very busy!


But, I've had time this weekend and over the past week or so to get a few crafty things done.


The first thing is sewing... in the past I've made a full quilt, a smaller quilt, and a pillow or two. I am in the process of making a couple for my bed.


So far I have the front piece done, and half of the backing.


It's hard to tell, but the animal print (still not sure what kind it is... looks like cow on here, but cheetah in person) is a darker brown with black which matches my room tones. The black stripes are made up of four squares sewn together, and the animal print is one solid piece. Surprisingly, the process to make what I have above took around an hour - alot less time than I had expected.


Secondly - I have taken up a new hobby. I'm not entirely sure what to call them... 'optical illusions' or just patterns? Either way, these are just some I have completed and some outlines I have yet to complete...


I find these so fun to create, and very calming and relaxing. They look really cool once their finished and can be used for whatever. Whether they're used as decorations, wall art, wrapping paper, etc. I get my pages from one of my classes in school, and I've searched around on the internet to find them (guess it would be helpful to know their proper names!) but I found a site that has some, linked below.


Hopefully I'll have some Christmasy things up this weekend or sometime in the coming week!


- Courtney


Tuesday, October 18, 2011

So sorry for the lack of posts :(

There really isn't much of an excuse, except for the one I'm about to throw at you. School, (tons of homework), driving lessons, managing two youth groups and trying to find me time (and time to be creative) is definetly getting in the way.
I do apologize! I have plans to post many great things (hopefully) very soon, such as... friendship bracelets (c'mon, you know they're super fun to make), an update on my cross stitch, journaling, more nail art and much more! Also, note: I have been doing a few crafty things here and there :)

Until soon,

Courtney

Sunday, September 4, 2011

Newspaper nail art!


This nail tutorial is something really fun that I love to do, and it's super easy! :)


you will need:


- rubbing alcohol


- scissors


- newspaper


- white nail polish & top coat


To start off, paint all your nails with 1 - 2 coats of the white polish until completely opaque. Make sure they are completely dry before moving onto the next step!


Pour a small amount of the rubbing alcohol into a bowl/container and cut out the piece of newspaper print you would like to use.


Next, dip your nail into the rubbing alcohol and press the newspaper onto your nail firmly for 5 - 10 seconds. Then proceed by carefully and slowly removing the paper off your nail.


After this has been done, apply a top coat and you should have a final result that looks a little something like this! :)


This nail design can also be done with different colours of polish, though lighter shades will make for better results!

Saturday, September 3, 2011

Creative & Colourful pebble magnets and cross stitching


Making colourful & creative pebbles is fun and easy to do! It requires minimum supplies that are cheap & easy to get.


You will need:


- scissors


- a magazine/images of your choice (scrapbook paper always works with this too)


- white glue


-small rounded magnets, or a magnet roll that you can cut into smaller pieces


- clear pebbles (can be bought at any home decor store, or in my case, the dollar store)


First off, you need to cut out the image or design you will use, and cover the back of your pebble in white glue.


Next, push the pebble firmly down onto the sheet for about three to five seconds. Let it dry.


Once the glue has dried, cut around the pebble to get rid of the excess paper. You will then need to put white glue on your magnet.


Same as before, push the magnet down firmly onto the pebble and let it dry for as long as need be.


And there you have it! it's as easy as that. Here I have made a fall theme, you can choose whichever you'd like to. You could also avoid the magnet part all together and just have the pebbles as they are and use them as decoractions in a glass bowl, around a picture frame, or anything of your desire.


Also, I've recently, taken up cross stitching and I've found it quite fun (apart from the fact that it takes a looonnnggg time). My first project is a cute little one in which the finished product should look a little something like this:


So far, this has been my progress over the last three days. All I have left is the wording!


Updates soon :)